How to Draw & Display your iPad LIVE in a video chat
/I'm working on some training materials and thought it would be helpful to share from my personal experience the best way to share what you are drawing on your iPad in Zoom, Google Hangouts, or any other video conferencing system.
Background
I find myself wanting to draw in pretty much every meeting I have. Many of these meetings take place virtually, using whatever video conferencing software my clients prefer. Drawing on an iPad is a whole lot better than physical whiteboards or the draw functionality built in to many conferencing apps, as long as you know how to do it well.
Over the past two years I uncovered a fool proof system that works in any situation and on any software-- all you need is a Macbook, your iPad/stylus, and a connecting cable. If you want to try this out, I would suggest doing a dry run of the steps below with a friend before trying this in a high stakes meeting.
Step 1: Set up
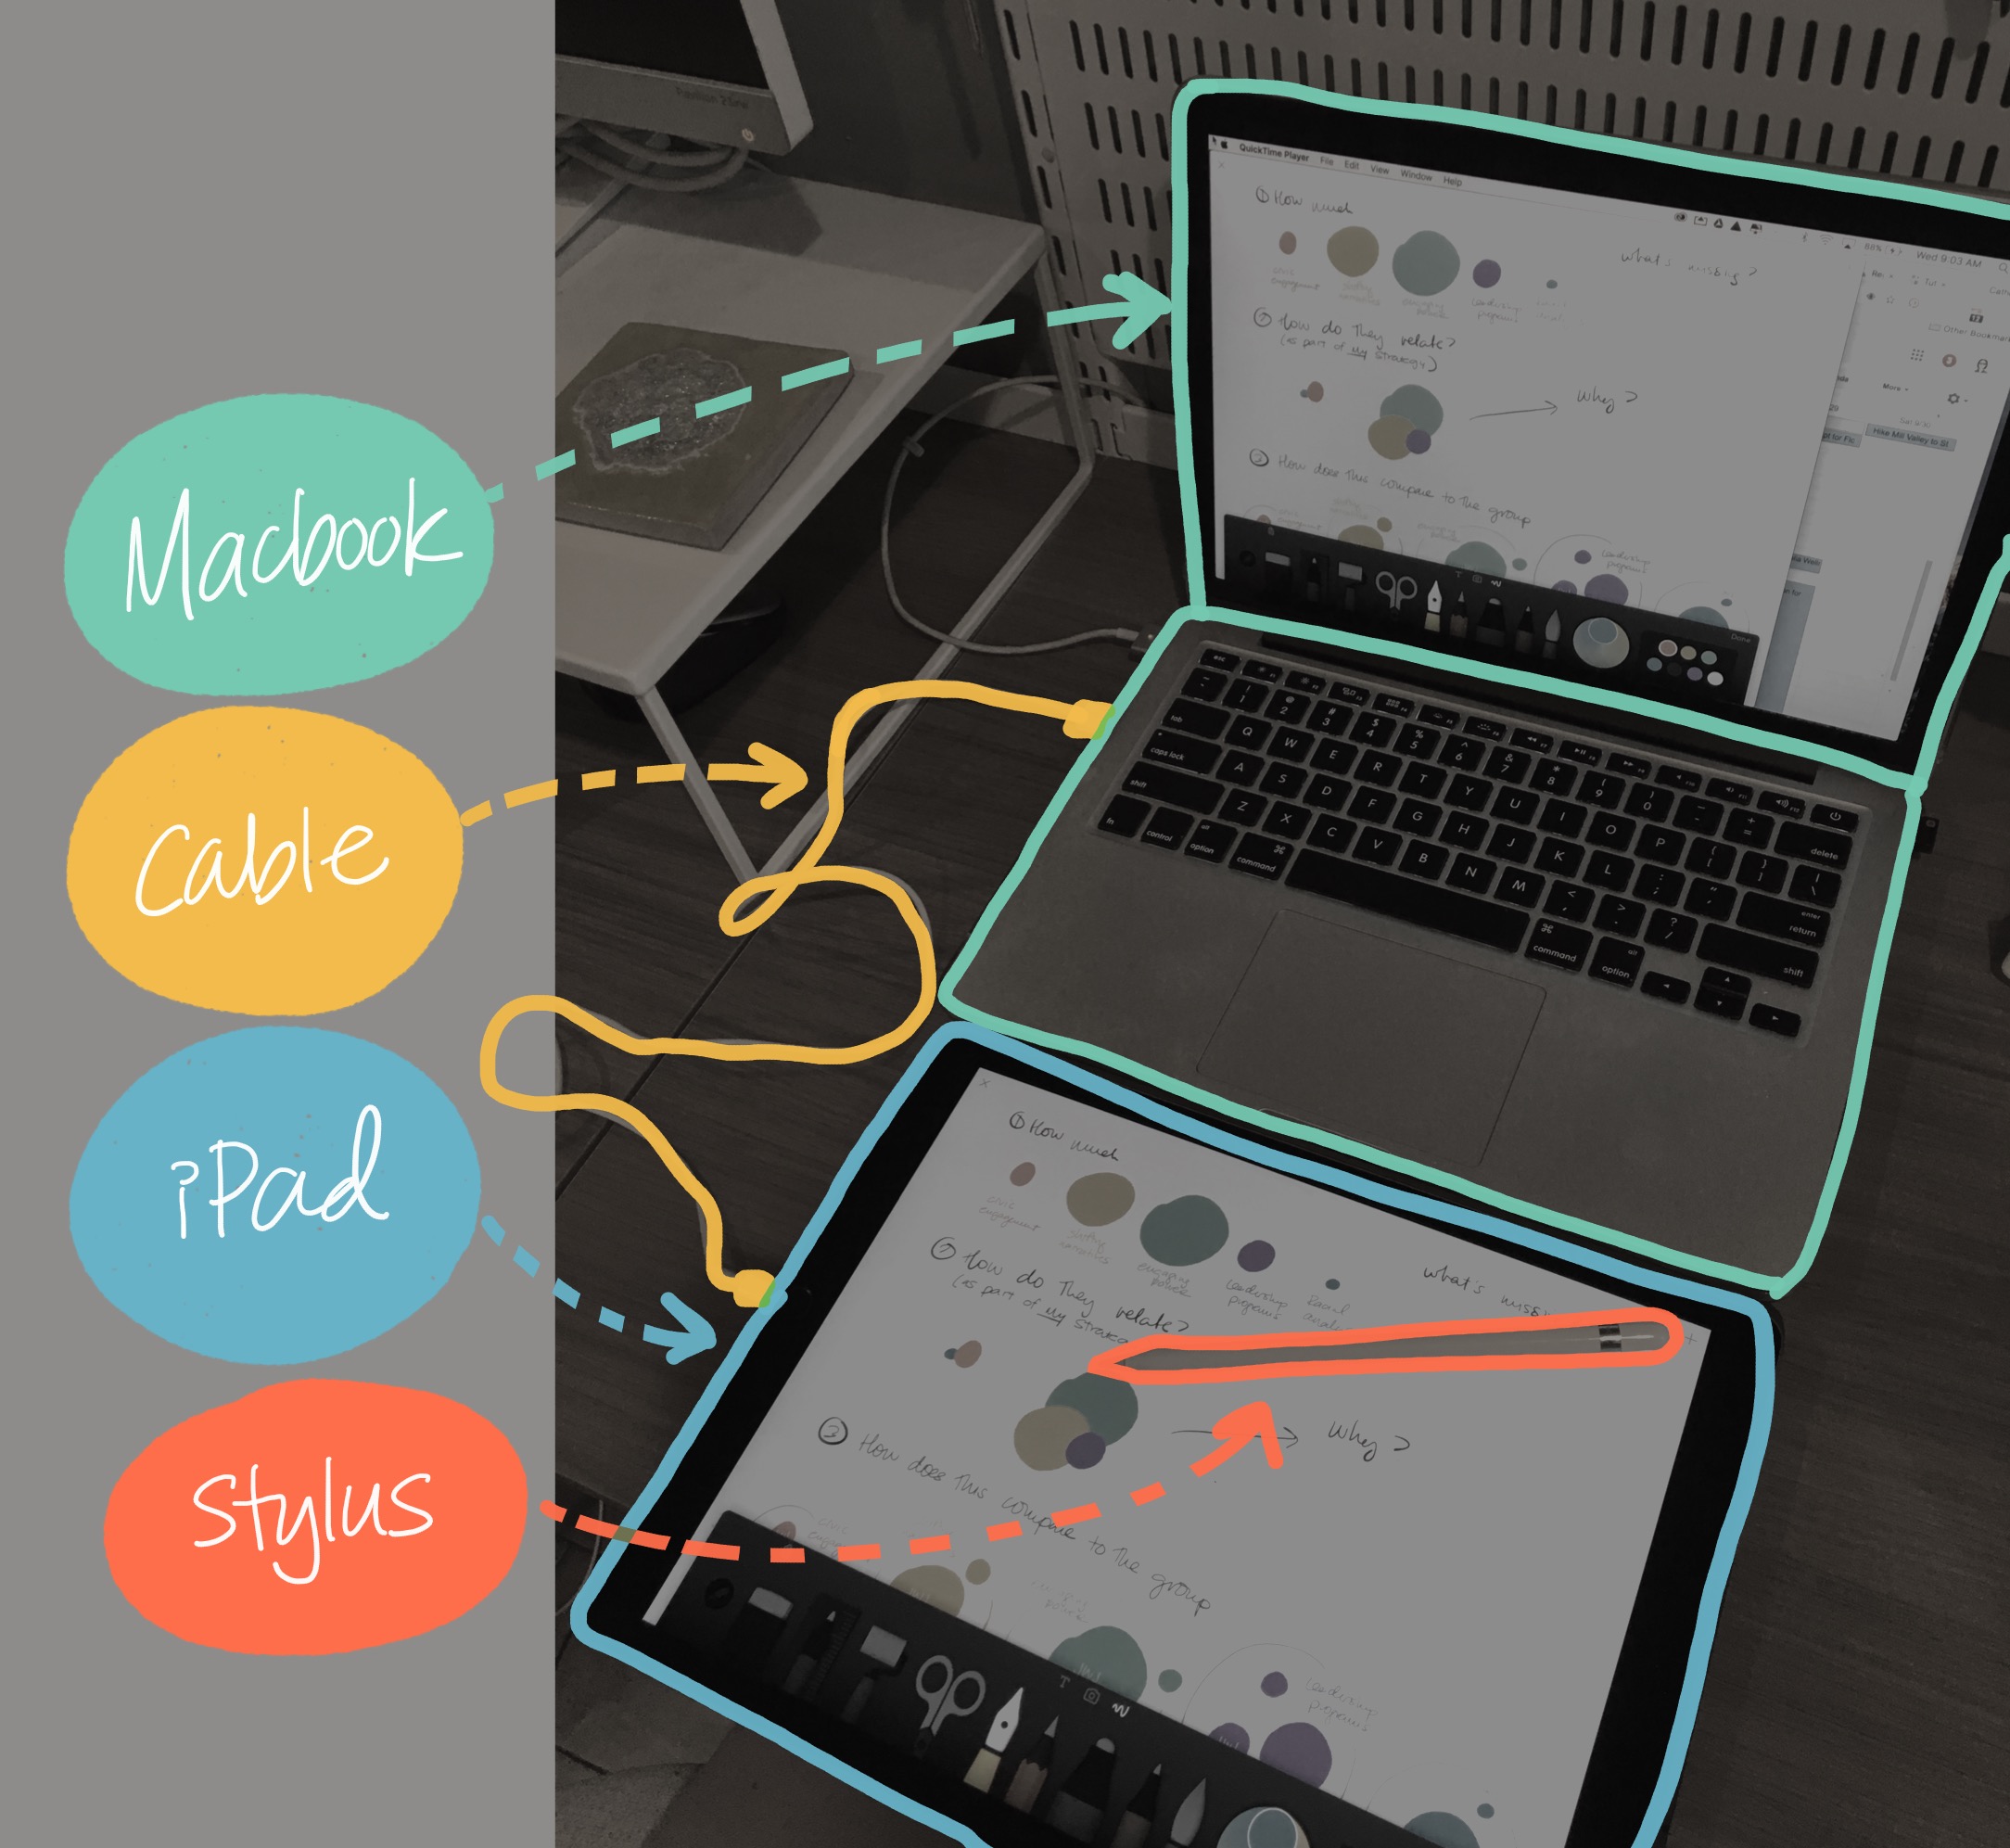
Connect your iPad to a Macbook via a PHYSICAL CABLE
Using Airplay doesn't work for two reasons: reliability and lag time. Joining direct from your iPad doesn't work either-- if you join a Zoom conference on your iPad, for example, you can only share from a small selection of apps-- drawing apps are NOT included.
Step 2: Display your Screen in Quick Time

Connect your iPad Screen as a movie recording in Quicktime
- With your iPad connected via USB, open QuickTime.
- Go to File and select New Movie Recording.
- A display will pop up, and it might show your webcam. If so, click on the small arrow by the record button and choose your iPad as the camera.

- Now your iPad display should be mirrored on the computer!
Step 3: Join the video chat
Join your video conference. Here's me and Silky in one of our weekly Google Hangouts... (note: if you are using google hangouts, you need to create a scheduled conference call-- I haven't been able to share my screen in an unscheduled video call initiated through a chat)

Log in to your video chat session to get started!
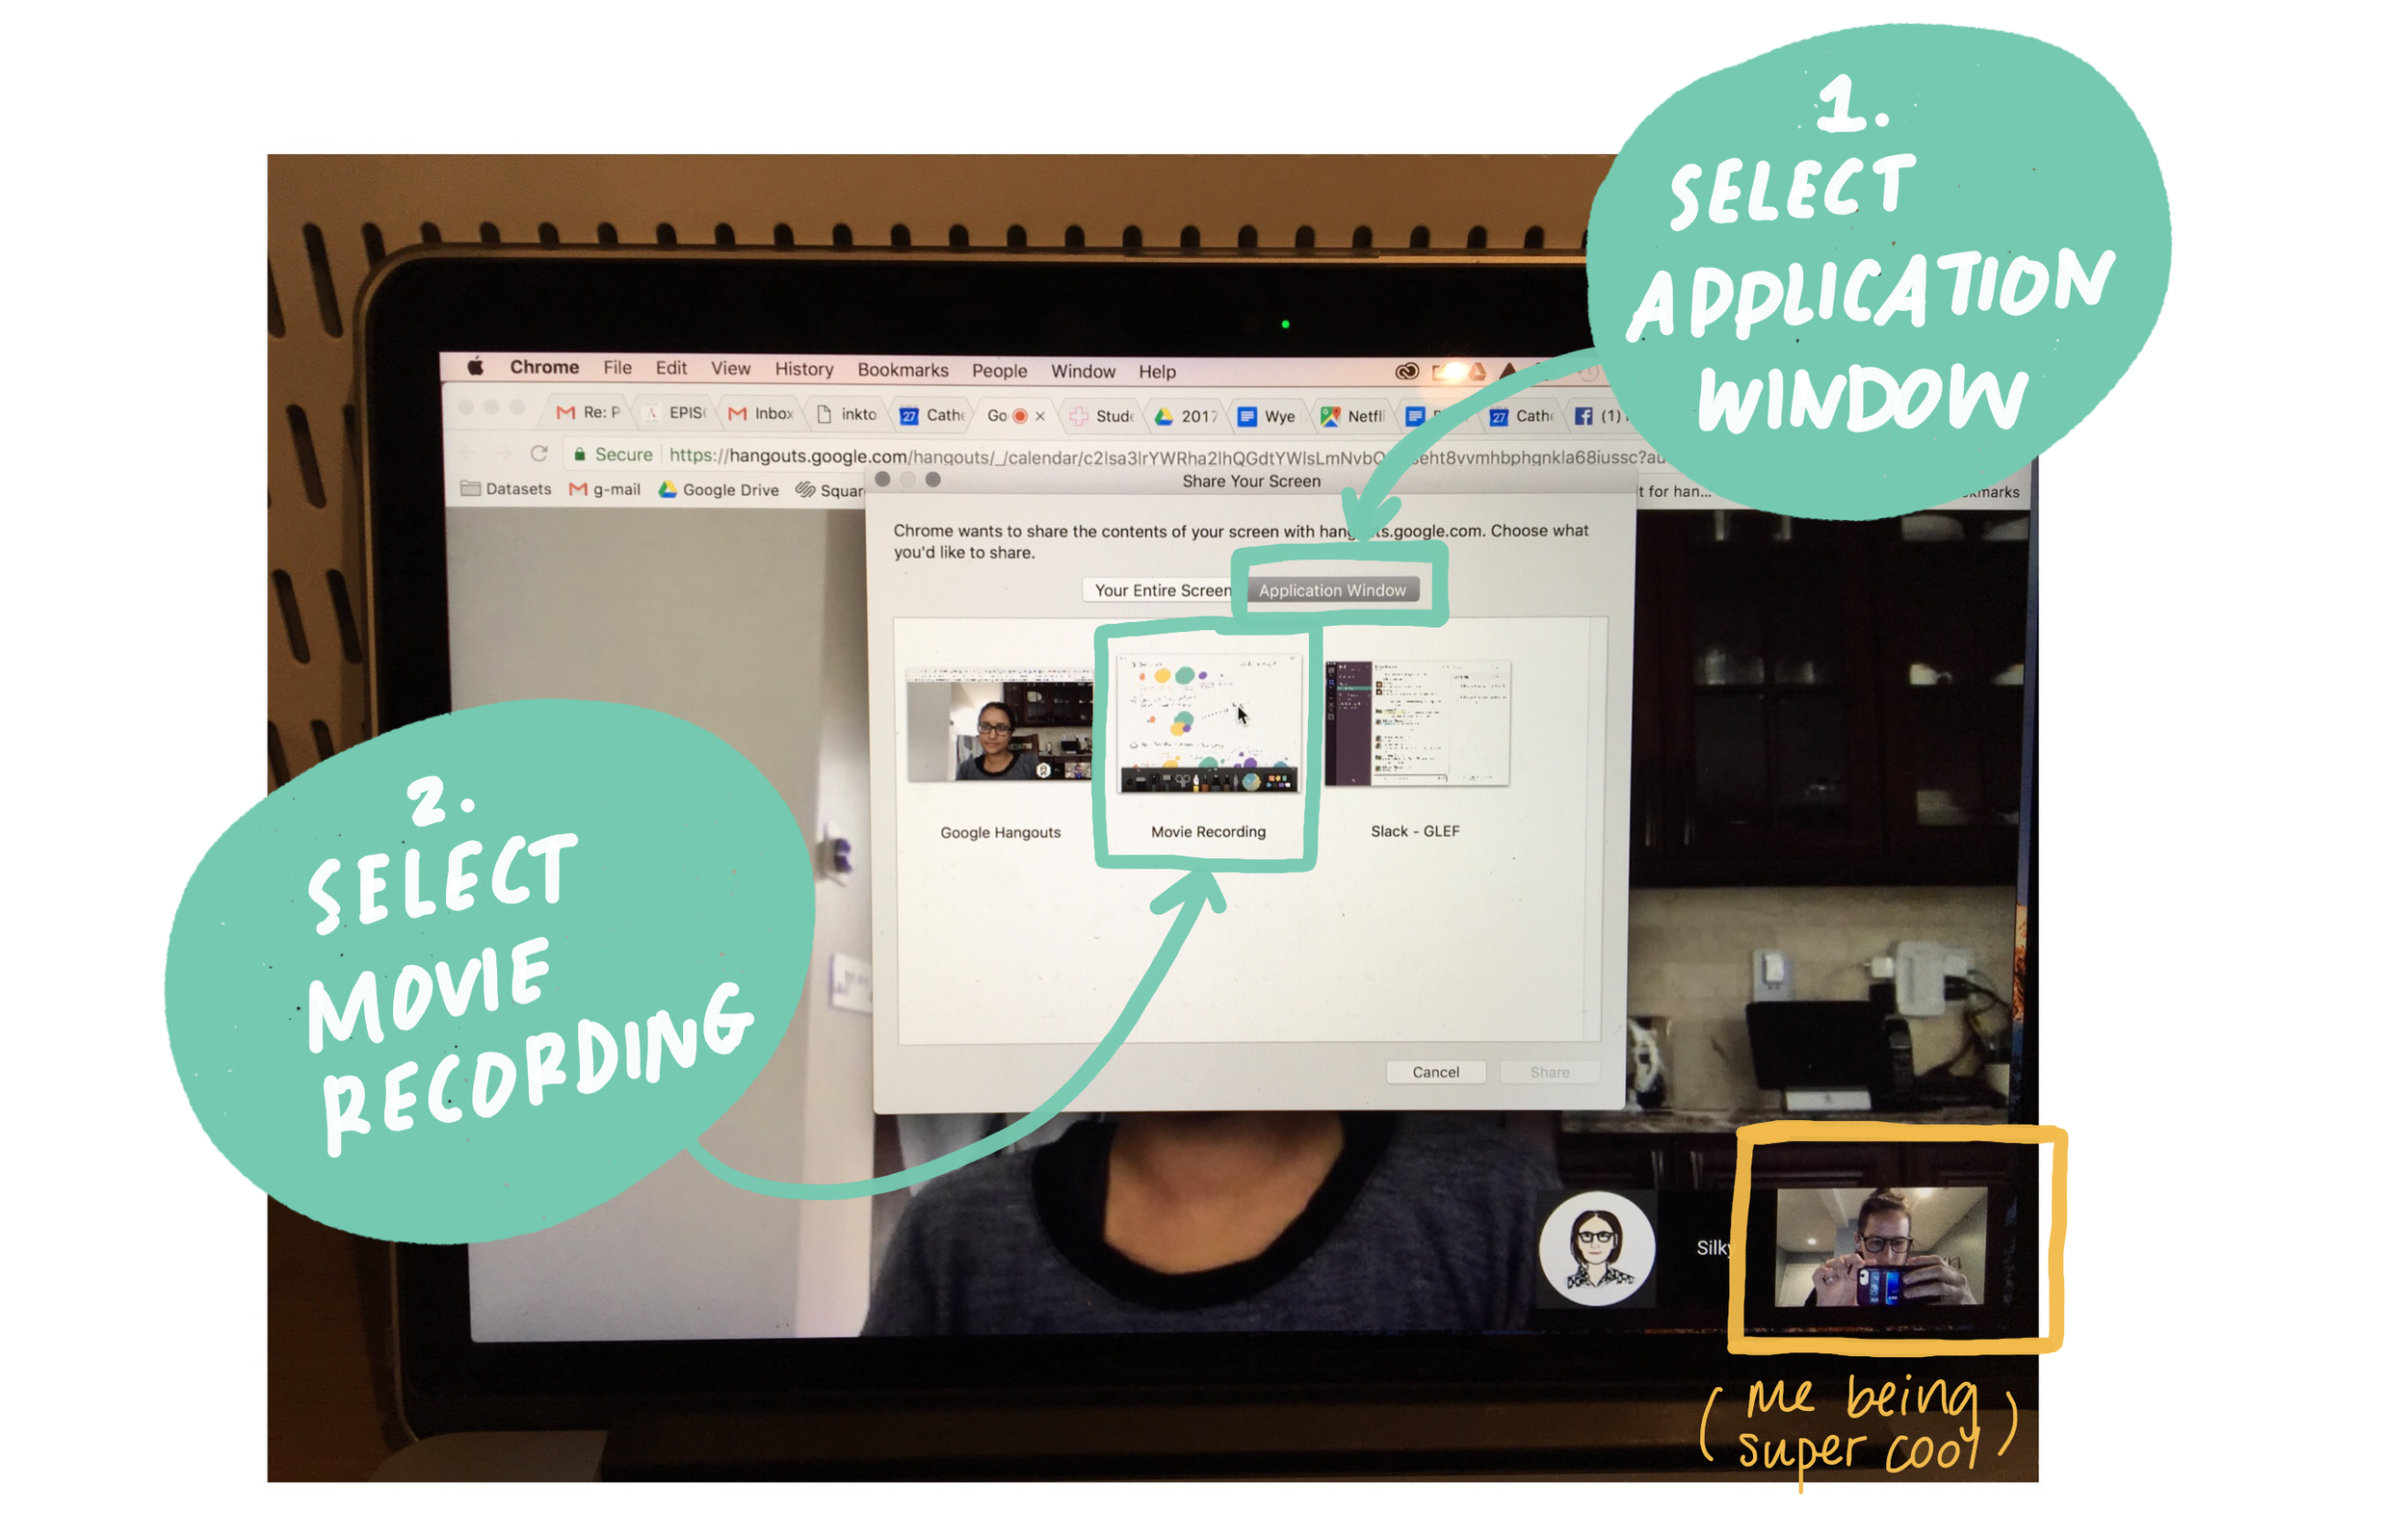
Step 4: Share your Screen
- Find the "display" or "share screen" button
- Choose to share an application vs. your entire screen
- Select your Quicktime movie recording as the application. Here's how it looks in Google Hangouts...
Step 5: Doodle!
Here is what it looks like on the receiving end of the hangout....

It's kind of like a whiteboard, but way better...
And there you have it!
STEP 6: Let me know if you have a better way!
This isn't the easiest process, I'll admit. It takes a while to get the hang of all of the steps, but I haven't found a more reliable alternative. Do you have any ideas? Share them in the comments or send me a tweet!